It had been a while since I had made Almond Milk, about two months, and when I went back to make it again I had to look up my blog to make sure I had the procedure/recipe correct. I hadn't updated the blog with my new procedure/recipe, but luckily I was able to see where I had changed things up.
This is my new favorite way to make Almond Milk and the results are much better than what I had before....and I liked what I had before.
I start quite a bit in advance of when I'm making Almond Milk. I have a few pint (?) mason jars that I keep in the cupboard, just to make life a little easier for me. In each jar is one cup (approximately 100 grams) of almonds and one tablespoon of brown rice. I usually have slivered or sliced almonds on-hand, but if I had whole almonds I'd probably chop them up first. I use these jars not only to keep the ingredients prepped, but also to soak the almonds and rice for eight hours/overnight.
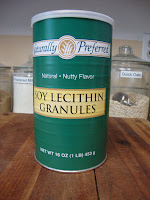
When soaked, they get a quick rinse in a strainer and added with 1500 ml of water. My soy-milk maker, a SoyaPower Plus, has markings for 1300 ml and 1500 ml, so I really don't need to measure it out before hand. Along with the soaked almonds and rice I add a tablespoon of Soy Lecithin granules. The lecithin acts as an emulsifier and helps give the finished milk a smooth consistency.
The SoyaPower Plus heats the mixture and grinds it up pretty quick. When it is finished I open it up and let it cool off for a few minutes and then quickly clean the immersion part of the machine. You don't want to let that part of the equipment dry and/or completely cool off before cleaning because it can be a pain to get all the almonds bits off.
Odds are the milk is still quite warm or maybe even a bit too hot to handle. I pour the milk through the strainer for an initial filtering and dump off the thick almond/rice sludge. That stuff could be dried for a crude protein powder, fed to the dog (mine loves it), or composted. I usually give some to the dog and the rest to the worms.
There is still too much "grit" in the milk for my tastes, so I pour it through a nut bag made for this purpose. At $10 I thought it was a pricey gamble, but the bag works perfectly and I can squeeze out all the milk. Before I was straining the milk through a jelly bag, but that took a lot of time and effort, which is really the reason I hadn't made Almond Milk in a while.
My next-to-last milk pour is into the container I'll put in the refrigerator. To this milk I add 2 tablespoons evaporated cane juice (unrefined sugar), a pinch of salt, and a teaspoon of (homemade) vanilla extract. While still warm the cane juice mixes easily.
After the milk cools the final pour is into my glass to drink. I've come a long way since I started making Almond Milk back at the beginning of the year. The results I have now rivals commercial Almond Milk from the store in both taste and consistency. Of course it isn't 100% "pure" Almond Milk, but I care more for the end results and the end results are good!


No comments:
Post a Comment