Showing posts with label Food. Show all posts

April 27, 2021

Twofer Tuesday: Kimchi Grilled Cheese Sandwich and Chipotle Mayo


Twofer Tuesday: Kimchi Grilled Cheese Sandwich and Chipotle Mayo
So now that I have my homemade Kimchi recipe down I've been enjoying it much more frequently than I had been before. I liked Kimchi, but the stuff I had been buying was downright ......effervescent? The brand I had bought (as recently just tossed) is actually a little carbonated because it was fermented so long.

Since I now had stuff I liked I decided I'd brush off my version of the best grilled cheese sandwich that I ever had, courtesy of a little grilled cheese shop in the Columbus OH, North Market that (IIRC) was called The Best of the Wurst.

I think there are other, more successful places with the same name, but if you're in Columbus and have the opportunity to go to the North Market.....hit this place up. I loved everything I've had there, but the Kimchi Grilled Cheese sandwich rocked my world, for more than one reason. It's great, obviously, but this sandwich introduced me to not just one knew flavor, but two. Because of this, consider this post a bit of a twofer.

Kimchi Grilled Cheese
The Kimchi Grilled Cheese Sandwich is pretty easy:

  • Sourdough Bread
  • Gruyère Cheese
  • Chipotle Mayo
  • Kimchi
Now the hard part for me is the cheese.....it's kind of pricey and usually only available in a small wedge, but I lucked out and found one market in town that had it not only at a decent price, but available sliced as thick as you like at the deli.


Kimchi Grilled Cheese

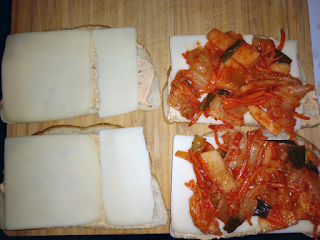
Lay down your bread, lay down some Chipotle Mayo....what, you don't have Chipotle Mayo? That's the twofer and the best DIY condiment you NEED to be making, so I'll loop around to making that at the end of this post. Anyway, Sourdough Bread & Chipotle Mayo go on first, followed by sliced Gruyère Cheese. Put those identical halves together with a little Kimchi in the middle and grill. I grill mine for about 6 minutes dry (i.e. no butter) on my George Forman grill.

Soooooo good.


OK, so this fancy Chipotle Mayo is the best stuff, but also the easiest thing to make. All you need to do is take one of those little cans of Chipotle in Adobo Sauce and toss it in your blender. Blend until smooth and add a little (like start off with a 1/2 tsp to a couple cups) to some mayo. The color should be a pinkish-orange, but go by taste. I make a small jar of Chipotle Mayo and keep it in the fridge and usually I end up having to throw out the majority of the blended Chipotle in Adobo Sauce because so little goes in the mayo.

I do consider Chipotle Mayo to be actual awesomesauce.

March 26, 2021

Pickled Red Onions


Pickled Red Onions
Listen....I know I've been on this food kick, more like a pickle kick, lately. I'm rounding the turn to the end goal here and to be honest all this stuff has been spread out over nearly three months....it's just that I have been shitty about documenting it all, which is partly why I've been blogging in the first place.

Not so much "something to do" as "where can I find my notes to do this again?" If someone else gleans some good details from here, so be it....a twofer.

Now I may have started with the pickled veggies as whole pickles, but the next thing I tried my hand at were some simple pickled red onions. This was so easy to do and a lot of bang-for-your-buck. These make a great condiment you can put on just about anything. I did two batches and gave a buddy one and he happily reports they go great on his morning eggs.

Now I didn't just make this up out of thin air, but stumbled across it on YouTube, specifically Ethan Chlebowski's channel. He's not my favorite YouTuber.......I haven't really thought about why or why not, but I suspect that a lot of his content just doesn't hit home with me (sorry Ethan....keep up the good work though!), but his video on Pickled Onions....is some good content.


Easy to follow along and right off the bat he pitches why you should have pickled onions in your fridge....and I have to agree.

Pickled Red Onions
Pickled Red Onions

  • Red Onions
  • Water
  • Vinegar
  • Salt

Thinly slice the red onion and pack into jar. Boil equal amounts water and vinegar and add a good pinch of salt. Bring liquid to boil and add to onions. Seal jar and place in fridge.


I used one of those fancy-schmancy flip-top jars, IIRC a liter jar, and one bag of four red onions filled it damned near perfectly. I found letting the jar cool down to room temp before placing in the fridge helped the onions "pink up" much faster. I tend to let my pickles stay at room temp for a couple days before refrigerating, but that's how I roll.

March 25, 2021

More Pickles! Condiment Pickles


More Pickles! Condiment Pickles
I've clearly been doing a lot of pickles lately. I do like cooking, but big meals....they can be expensive and a lot of work....and if you need to experiment and tweak, that's a lot more money and time and....you can only eat this big meal so often.

Condiments on the other hand. Relatively cheap & easy. Sure some might take a lot of effort, but then I get to use those condiments a lot more often than I would for any individual meal. Condiments get a lot more mileage and can lift up a lot of other meals.

After doing some vegetables, eggs, onions, cucumbers, and even Kimchi I figured I was done, well maybe not done....done, but not really branching out any more. I'm going to go back and tweak my basic vegetable pickles and I have a crapload of other pickles to eat up.

Then I watched this video about food prep. I'm not planning on doing any fancy food prep, but I like the channel and I'm already watching YouTube.....


Hmm......I like the idea of a simple vegetable pickle as an ingredient. My earlier vegetable pickles were to enjoy on their own. This is much closer to the red onion pickles, which are awesome btw (I'll post about that later) and outside of carrots & potatoes.....I really haven't done diddly squat with root vegetables, well maybe Daikon, but that's something I should have totally included....note to self.

Finished Pickles

Quick Vegetable Pickle Condiment

  • Rutabagas
  • Parsnips
  • Turnips
  • Carrots

Notice I didn't add quantities here.....I got one big rutabaga and one bag each of parsnips, turnips, and julienned carrots. Peel and julienne all the vegetables and mix well. Pack into jars and fill with brine. Seal and leave to pickle for three days then refrigerate.

  • 2 cups Water
  • 1.5 cups Vinegar
  • 3 Tablespoons Salt
  • 3 Tablespoons Sugar
  • 2 Dried Chile de Arbol
  • 4 Allspice

This is the basic brine........I ended up needing 3x the quantity above, so if following along I'd start with a triple batch of brine. Mix everything together and bring to a boil.


As mentioned before, I could see adding Diakon, but radishes in general would work and if you could get some other colored versions of these vegetables, the final product would look a lit nicer.

Initial Cooking Fail Fixed on a Second Pass: Kimchi


Initial Cooking Fail Fixed on a Second Pass: Kimchi
Spending too much time at home usually leads to just a couple options for me: eat too much, watch too much, or do too much.

I figure why do anything half-assed? I can try to do all three.

My attempt for this is largely to try cooking/kitchen stuff while watching TV (well, more YouTube than anything) and then eating said results. Win/Win/Win....right?


Well except for when my kitchen projects result in failure, or at least partial failures.

After doing all kinds of pickles, a bunch of which I haven't even posted about yet, I decided I wanted to try me some Kimchi. I found a cooking YouTube channel that I adore....one of several, that had a Kimchi recipe. I tried following it as close to the letter as I could and....it did NOT work out. I'd love to blame the video, but there was a warning embedded and I can be an idiot....


Too-Salty 1st Batch
Too salty and weak colored

Now I couldn't find an asian pear, so I used some regular pears, which worked fine. Two things I think did not work out, well one definitely didn't work out: I did not get my cabbage rinsed well enough. The end result tasted decent enough, save for the fact it was way too salty.

Ugh.

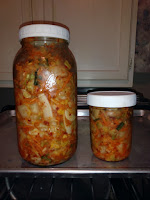
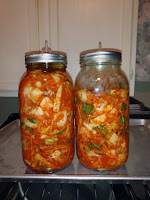
I had to try again and this time fix that error and one more: I used some Chinese Red Pepper flakes. Nope, you really should use the Korean Red Pepper flakes. Nothing else will work as well, at least according to some other Kimchi videos I watched. I went ahead and stopped by my favorite Korean Market and picked up the good pepper and a way-too-expensive (but so tasty) Asian Pear. As luck would have it I found some cheaper Diakon there and chatted up the owner. He doesn't eat Kimchi, but he makes the stuff they sold there and he told me that he salts his cabbage for 24 hours and rinses it excessively and drains it for a couple of hours.

Kimchi

  • 1 Nappa Cabbage
  • 1 Diakon
  • 2 bunches Green Onion
  • 1 Package Julienne Carrots
Quarter & core the cabbage then cut into 1 inch strips. Heavily salt the cabbage, massaging the salt into the cabbage and allow to sweat out all the water possible. Set aside in an appropriate container for 24 hours. Rinse multiple times and squeeze out as much water as possible. Soak, rinse & repeat until the cabbage is not very salty. When squeezing the cabbage, pretend it owes you money or wronged you in a past life!

Cut the onions into half-inch to one inch pieces, and the Diakon into desired slices and toss all the vegetables with the wilted cabbage.

  • 2" Peeled Ginger
  • 1 Asian Pear (or a couple regular pears), peeled/cored & chopped
  • 6 cloves peeled garlic
  • 1/4 cup Fish Sauce
  • 1/4 to 1/3 cup Korean Red Pepper Flakes
Much better 2nd batch
Better color and flavor

Place all the ingredients (just the 5 listed above) in a blender or food processor and blend as finely as possible.

Toss all ingredients together (best wear gloves!) and pack tightly into jars. Cap loosely and use an airlock if you have one. Set aside for a few days (I prefer about 6), up to a week. When the Kimchi is fermented enough, it'll get a little "fizzy" as it ages, cap tightly and refrigerate.

I could easily see adding other vegetables or ratio of vegetables to customize your Kimchi mix. 


Fixing my Cast-Iron Pan


Fixing my Cast-Iron Pan
Not so much a hack as a fix.

I recently purchased a new cast-iron frying pan....a big one from Lodge. It's been a while since I have purchased a new cast-iron anything, and I was not aware that Lodge has changed how they made & sold their products.

My norm was to take any new cast-iron home, give it a good cleaning, and then start the seasoning process. These days Lodge has gone ahead and started pre-seasoning their products.

Sounds like a good shortcut, no?


Yeah....not so much. 

The pre-seasoning on their products isn't the best. The coating is a bit uneven and the end results are not better than just doing it yourself. Of course I just seasoned over the top of what was there and that was OK for a good bit, but not all, of my cooking. My attempts at seasoning didn't fill-in the uneven areas, just took that uneven profile and basically raised it.

Thankfully there is a fix, which I found here:

After sanding down to bare-ish metal
Initial Grind

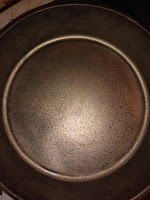
Sanding it down to bare-metalish was easier than expected. I really thought it'd be harder than it was. Cleanup was more difficult, but still nothing to sneeze at. Then I just needed to start re-seasoning. My oil of choice is Grapeseed oil....because it was easiest for me to find at the grocery store.

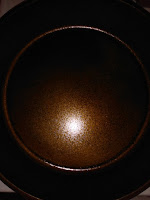
This is where it started at.

One grapeseed oil seasoning later
One seasoning later...

After one coat....


Two grapeseed oil seasonings later
Two seasonings later...

After a second coat...

Now I did a total of four coats, and while the bronze color did intensify, it wasn't significant enough in the photos I took. To the naked eye, big difference. I'm not sure if it was the lighting in the kitchen or my camera flash, but the subsequent pics weren't worthwhile.

The finish is nice and smooth now. I'm sure the pan needs to be broken-in and used a lot more, but with a smooth bottom it'll get used more often now.

March 8, 2021

Bread & Butter Pickles


Bread & Butter Pickles
Since I've been spending a lot of time home alone trying not to spend money, I've needed something to do. In the last couple weeks I've done a LOT of pickles. 

Yes, started with vegetables, and then I went to eggs (which I haven't posted yet), then I went to salt-cured eggs (again, future post) and then pickled onions (OMG, amazing and I'll post that one next). Basically I've been fiddle-farting around with a bunch of new pickles and ferments.........oh yeah, getting back into my Sourdough as well, but the one thing I haven't done is straight up "regular" pickles.

I do have two recipes for pickles from one of my Grandmothers and one of them I've actually been wanting to eat for some time, so today was the day to make some Bread & Butter Pickles....but I couldn't find my cookbook where I recorded the recipe!

^%!$@

Luckily I managed to figure out that I had typed it up on an online Google Document, so I was good to go...after getting supplies from the store. The recipe I had written down was for twice the amount that I ended up making, but the brine/syrup/liquid listed was good for the half batch I made tonight, so lucky me. A big bonus was that I picked up my cucumbers at Walmart where they had smaller cucumbers in 2# bags, which was convenient.

Bread & Butter Pickles

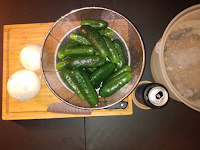
Initial ingredients

2 qts                Thick sliced cucumbers (about 4 pounds)

2 medium        Sliced onions

1/2 cup            Pickling Salt

Soaking in Ice Water


Combine and let stand in ice water for 2 to 3 hours.  Drain well


5 cups            Sugar

3 cups            Vinegar

1 tsp                Celery Seed

1 tsp                Mustard Seed

1/2 tsp             Ground Tumeric

Combine mixture with cucumbers and onions.  Bring to boil and pack into sterilized jars.  Cover with liquid and seal.


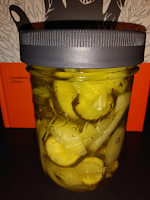
Finished Pickles
Notes: The cucumbers and onions look like they were way too much for the liquid, but they cooked down some as everything heated up. I just packed into clean jars and did not seal, since I just put them into the fridge. I was able to get one half-gallon jar and three pint jars of pickles from all this.


February 26, 2021

Vegetable Pickle Experimentation


Vegetable Pickle Experimentation
Yep, this is not only my second post this month, but my second cooking post in a row.......strap in, 'cause I have a few more cooking posts coming up, because I'm stuck at home and haven't got that much better to be doing other than working on projects of one sort or another.

Now that I have some peppered vinegar I decided I should try to use some to make pickled vegetables. While I'm at it I figured I'd also try to make some lacto-acid fermented pickled veggies as well.

I started by gathering a bunch of veggies, mostly cauliflower, carrots, green beans, daikon, and green onions. I did also chop up some peppers (serrano, jalapeno, and thai), but they weren't in each batch of pickles.

I broke out a set of six half-gallon mason jars and filled them about 3/4 of the way with a mix of veggies. Half of the jars were filled with the seasoned vinegar and the other half were filled with a mix of Apple Cider and White Vinegar (roughly 2/3 & 1/3).....I wanted just Apple Cider Vinegar, but I didn't have enough.

Some spices went into every jar, some additional just in the "regular" set, and from there three additional spice mixtures were made so I could compare similar spices in vegetables with the differing vinegar bases. 

It gets confusing quick, so I had to make a little chart. Instead of posting that  I'll just put down each jar and everything that isn't the veggies:

Jar A : Seasoned Vinegar/Water (50/50), 2-3 whole cloves Garlic, 1T Coriander, 1t Mustard Seed, 1t whole Black Peppercorns, 1t Celery Salt (04Mar21 Notes: Hot & Spicy with strong after-taste 2nd best of the lot)

Jar B : Apple Cider/White Vinegar mix/Water (50/50), 4 whole cloves Garlic, 3-4 whole Thai Chilis, 2 thick-sliced Serrano Chilies, 2 thick-sliced Jalapeno Chilies, 1T Coriander, 1t Mustard Seed, 1t whole Black Peppercorns, 1t Celery Salt (04Mar21 Notes: Not as hot & spicy as Jar A, but sharper "pickle" taste/sensation; best pickle of the group)

Jar C : Seasoned Vinegar/Water (50/50), 2-3 whole cloves Garlic, 1T Coriander, 1t Mustard Seed, 1t Cumin, 1 dried Bay Leaf, 1/2t Oregano (04Mar21 Notes: Kind of a savory [?] compared to others, with hot & spicy undertones; just "OK")

Jar D : Apple Cider/White Vinegar mix/Water (50/50), 4 whole cloves Garlic, 3-4 whole Thai Chilis, 2 thick-sliced Serrano Chilies, 2 thick-sliced Jalapeno Chilies, 1T Coriander, 1t Mustard Seed, 1t Cumin, 1 dried Bay Leaf, 1/2t Oregano (04Mar21 Notes: Very "meh", closest to what I would think of as a grocery store weak pickle; worst of the lot)

Jar E : Seasoned Vinegar/Water (50/50), 2-3 whole cloves Garlic, 1T Coriander, 1t Mustard Seed, 2 Allspice berries, 3 Cardamom pods, 2 whole cloves (04Mar21 Notes: Hot & spicy with "interesting" notes I cannot quite place)

Jar F : Apple Cider/White Vinegar mix/Water (50/50), 4 whole cloves Garlic, 3-4 whole Thai Chilis, 2 thick-sliced Serrano Chilies, 2 thick-sliced Jalapeno Chilies, 1T Coriander, 1t Mustard Seed, 2 Allspice berries, 3 Cardamom pods, 2 whole cloves (04Mar21 Notes: Not as hot & spicy as Jar "E", but weird after-taste that is definitely from the cardamom and maybe the cloves interaction; don't add cardamom again!)

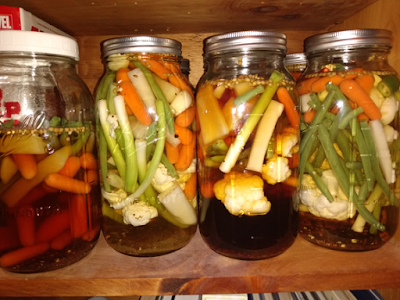
My various pickle blend samples

The lacto-fermented pickled vegetables.....evidently I failed to right down what spices I used. Ugh. Looking at the jar I can see Corriander, Black Peppercorns, and I think some Mustard Seeds. I know I didn't measure. Instead of vinegar, a simple brine is used (1T salt per cup of water) along with a couple packets of Starter Culture from Cutting Edge Cultures. These pickles are going to take a while to ferment, probably at least 10 days.

Lacto-fermented vegetable pickles

I'll update this post when I get some taste-testing in......

Making Some Peppered Vinegar


Making Some Peppered Vinegar
This last Christmas I made my fermented hot sauce again. As part of that "build" I decided to go ahead and make some spiced vinegar instead of using just plain vinegar in the hot sauce. One of my recipients has a wife who's very allergic to one of the ingredients, so I figured the spiced vinegar would have to do for them as a gift.......also, I like the stuff so good enough reason.

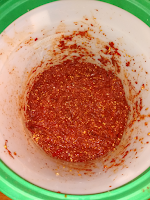
The spiced vinegar is essentially a "tea" made from white vinegar, dried peppers, and some garlic. That's it. Everything was placed in a clean 5 gallon bucket with a gamma lid and left to rest for a month. The initial "pull" of vinegar was just what I could draw off the top using a big ladle and a filtered funnel to keep out the inevitable pepper that got into the ladle. I'm not sure how much vinegar was left when I was done, but I essentially had a half-full bucket of wet peppers.

Beginning of batch #3

I knew there is a LOT of goodness still left in the bucket, so I went ahead and filled it back up with white vinegar and left it to steep for two months. I only got a gallon and a half or so out of the second steeping, but they peppers still looked good so I'm going for another batch of spiced vinegar. This time though I went ahead and ran all the vinegar-sogged peppers through a food processor, which shredded it quite a bit and compacted the lot quite a bit. I added a couple more heads of garlic, sliced roughly, and almost a pound of red pepper powder from the Korean Store here in town. I was able to get somewhere between three and four gallons of white vinegar into the bucket and I'll let this last bit steep for several months for a final batch.

One thing I did do though is reserve a good bit of the pepper mash, about 2 1/2 pints worth, added two heads of garlic and a little bit of the seasoned pepper and 1.6% salt. Blended well and packed into jars I now have some Garlic Chilli paste for cooking with.

Ok....I'm sure you've gotten to this point and have been thinking...."That's nice Chris, but you haven't really given me much to go on....."

True, but while the reason I was even screwing around with this second and then potential third batch is because one of my brothers asked me if I had any more of the vinegar because he was almost out, and another had asked me how I made it. I figured I'd go ahead and hook the former up with his own setup using a 2 gallon dispenser I literally had laying around:

Pepper Seasoned Vinegar

Ingredients

Basic 2 gallon load-out

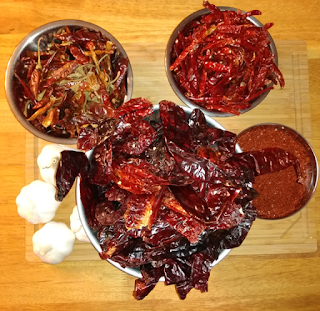
Dried Peppers

     1/3# Chile de Arbol

     1/3# Chile Puya

     1/3# Chile Guajillo 

4 Heads Garlic

1C Korean Powdered Pepper Flakes

2 gallons White Vinegar

2 Gallon Vessel (Bucket, Dispenser, etc)


The dried chilies, and the garlic, were purchased from the local Mexican food market and the dried pepper flakes were from the Korean market. The weights for the dried peppers are just approximate, but by in-the-bag volume I went with a ratio of equal amounts the larger Guajillo peppers and a combo of smaller Puya and Arbol peppers.  Do you need to use those exact peppers? Heck no. Grab what looks good, get extra, and just go nuts. These peppers and the garlic came out to $6.35. Now the powdered pepper flakes were $4.50 for a 1# bag and might be a bit much since I only used a cup. You could easily just grab some more/different dried peppers in its place....again, go nuts.

Looks more expensive than they are

Peel and slice the garlic, and layer what you can in your vessel. I used an extra 2 gallon dispenser I had previously used for making Kombucha (which I learned I don't care for that much). Fill that bad boy up with your dry ingredients and then fill in the rest with vinegar. You should easily get a gallon in and probably more.

Before & after on filling the dispenser

Total cost, including the jar and the extra vinegar that didn't go into the jar.....$24....and half the cost was the jar! If you want to be pessimistic and assume we only got in one gallon of white vinegar and were only able to get one infusion's worth of vinegar, then you get a cost of $12 a gallon, or roughly 10¢ an ounce. 

When you figure the cheapest peppered vinegar (only one type of pepper) runs 30¢ an ounce and the high-end stuff runs $3.00 an ounce, doing a little kitchen work not only pays off, but gets you some fancy-schmancy dividends, er vinegar.

March 23, 2015

Umm.....There's Some Freedom in my Coffee!

Umm.....There's Some Freedom in my Coffee!
First off, I know.....two posts in as many days. Well, don't get your knickers in a knot, I just had something worth posting about.

Last Christmas the Mrs. wanted a Keurig coffee maker. We aren't that big on coffee, or even tea for that matter, but every once in a while....

I bought what I thought was a reasonable machine...not a Keurig, but something I thought would work reasonably well. It could easily brew into travel mug, didn't take up too much space, and didn't come with the dreaded Keurig 2.0 DRM...or at least I didn't think it did.

I never got to find out because my wife wanted to return it and get an "actual" Keurig. Didn't hurt my feelings any....that's the nature of gifts. Luckily there was a pretty good deal going on at Fred Meyer and by the time everything was said and done, the Keurig only costs about 2x what I had spent on the "lesser" machine (my emphasis, not hers). She had the money for the "upgrade", and the coffee, so go for it!

My only real problem at that point was that some of the other gifts I had gotten her, namely some coffee and some reusable cups wouldn't work with the new machine because of that pesky DRM. Now I know it isn't hard to get the Keurigs to recognize the "ordinary" cups, hardly even considered a hack, but my tinkering with the machine was verboten......

.....but not for long!

March 22, 2015

Homemade Ketchup that Rocks!

Homemade Ketchup that Rocks!
I'm sure I've mentioned a few times that I like to make my family & friends Christmas presents, usually food, every year. Last year I made everything gluten-free since a family friend has a gluten sensitivity and another friend eats gluten free because his son is a bonafide Celiac.

Last year's offerings were Worcestershire sauce, Tamari Sauce, and some good old-fashioned BBQ sauce. For the BBQ sauce, I found a base sauce I liked, and started to tweak from there. For me it was more than interesting that the BBQ sauce was going to use as ingredients some of the other things I've made, not just this year, but in the past as well.

Now the base of most BBQ....ok, wet & not white BBQ sauce (oh God, never the white...) is some sort of ketchup, sugar, and spices. My intention was to substitute my homemade pineapple jam for the sugar in the BBQ and I really didn't want to be adding other sugar in the form of store-bought ketchup.

This means I have to make my own ketchup......CHALLENGE ACCEPTED!

This is actually pretty easy to do, but it takes a decent amount of time and at least in my case, a bit of trial and error. Cooking is done in a slow cooker, but I learned that not just any slow cooker will do. Out of the three I have, only the smallest of mine, the 1 & 1/2 qt, worked worth a damn. I tried scaling this up with my 3 qt and 8 qt slow-cookers and it just didn't cook down.

The original recipe comes from Chef John at allrecipes.com and is tweaked mostly by substitution ingredients, which have been denoted with italics. "Substitution" might be an odd word selection because some are the regular ingredients, just once I made myself.

Ketchup cooking down
1 hour in, 10 more to go...
Ingredients:
2 x 28 oz cans ground tomatoes
2/3 cups Pineapple Jam
3/4 cups Braggs Apple Cider Vinegar
1 tsp onion powder
1/2 tsp garlic powder
1 3/4 tsp Alderwood Smoked Salt
1/8 tsp Celery Salt
1/8 tsp Mustard Powder
1/4 tsp finely ground black pepper
1 whole clove

1/2 cup water

Directions:
Dump everything except the water into your slow cooker. Use the water to swish-out the cans to get every last bit of tomatoes out. Give the thinned ketchup a stir, turn the slow-cooker on HIGH, and cook for 10-12 hours uncovered. Makes sure to stir the cooking ketchup every hour or so.

Once the kecthup is cooked down, turn off the cooker and allow to cool. Blend the cooled ketchup and strain. Tweak seasonings as needed (but I haven't felt that was necessary) and bottle for future use.

Note:
This smells awesome as it cooks down....plan accordingly!

24Jul24 Update: I noticed that two ingredients were lacking measurements (3/4 of what?) and I wanted to note that yes....you could omit or cut down on the liquids for a shorter cook time, but tomatoes are an unusual fruit in that they does well with either little to no cooking time or you cook them for a long period of time, which really deepens the flavors. I don't understand the how's or why's, but it's a thing....Google it.

November 8, 2014

The Crooked Fence Barrelhouse is on the "Short List"

The Crooked Fence Barrelhouse in Garden City is awesome
Longtime readers, AKA Mom & Dad, OK, who am I kidding?...Those of your who check in periodically or accidentally find their way on to this blog might have read that for years it seemed me & the Mrs. had something of a "restaurant curse". We've had really bad luck at places, as-in "given out own section and forgotten about when our server went home for the night" bad luck.

October 13, 2014

Not-So-Bad Zucchini Bread

Not-So-Bad Zucchini Bread
Actually, despite the title, this is one of my prouder kitchen accomplishments. This last week I think I've spent four days in the kitchen working on a couple of long-term food projects, one of which has taken 18 months to be ready.....

I've been in there long enough to realize I wish my counters were about an inch, maybe an inch and half taller than they were, but that isn't a quick or inexpensive fix.

Also happening last week was the end of a contest for my Toastmasters club and I was on the losing non-winning side of the club. As 1st runner up in a contest with only two teams, my group was unceremoniously re-named "Steve's Snack Squad" and we were tasked with bringing food for this week's meeting.

Now I've been experimenting with  Zucchini Bread off-and-on over the years and I finally think I've got my preferred recipe dialed-in now. I've gotten tons of good feedback on this recipe and figured I'd share it with the world instead of hording it myself.....

August 26, 2014

Making "Wild" Cherry Plum Jelly

Making "Wild" Cherry Plum Jelly
Last weekend my In-Laws called and asked if we wanted any cantaloupe because they had several nice-sized melons mature at the same time and it was too much for them. Since we were actually at the grocery store buying cantaloupe the answer was a no-brainer.

When my wife and I headed over there we, well I, wanted to take a look at their yard & garden since we hadn't been in the back yard for months. A surprising discovery was a small fruit tree they weren't aware they had. Now if this was my parents property I could understand because they have hundreds of acres and an actual orchard, but a surprise fruit tree in a small quarter-acre lot (I have no idea how big it is...but they live in town so....) when you've lived in the home for 30+ years.....

August 4, 2013

Homemade Pineapple Vinegar

Homemade Pineapple Vinegar
It has only taken about two months, but I have finally finished making pineapple vinegar.

Fred Meyer had a big sale on pineapple a couple months ago. They were $1 a piece and of course I stocked up. Fresh pineapple is fricken awesome and I made a HUGE batch of pineapple jam.

I'm always up for trying new food projects and after reading a copy of Wild Fermentation I decided I really needed to try pineapple vinegar from the huge amount of pineapple scraps I had. Of course I didn't use all the scraps I had, but I did this on a large scale, making almost 2 1/2 gallons.

I didn't quite follow the Wild Fermentation book to the letter, nor did I really follow any specific directions. After looking at a lot of slight different "recipes" online I just went with the general summation I mentally made. The variations were pretty wide, ranging from one pineapple skin good for one quart to one skin good for a gallon. The amount of brown sugar seemed reasonably static around 1/4 cup per pineapple skin.

July 14, 2013

Kana Girl's Hawai'ian BBQ

This week I've been a bit busy with a side project (a new blog for my HackMaster Campaign), but I wasn't too busy to be able to try a new restaurant with the Mrs.

In the past we've had so much bad luck with new-to-us restaurants that she though we had a curse of some type and quite frankly I wasn't willing to try out new places unless I had to. My standards of service are pretty fricken low to begin with and so many places fail miserably. It is no wonder that so many places don't make it a year.

It was with a bit of trepidation that I bypassed the familiarity of one trusted pace to try out Kana Girl's Hawai'ian BBQ. Boise, or at least the larger metropolitan area, has a few "Hawai'ian" places. One is fake as hell, the other is more of an upscale "fusion" place (I could be wrong, but it is so out of our way I won't ever find out), and the other is just ok. The last place was this new place on State Street (3912 W State Street to be exact).

We parked out back and walked in the back entrance, something that I was advised never to do. It is generally good advice to avoid the back of a restaurant if you want to keep your appetite. This was a notable exception. I don't know if the aromas were coming from their cookers or the smokehouse next door and frankly I didn't care. I just wanted to jam some smoked meat in my face hole now.

At first glance I think a lot of people would think that the Kana Girl's Hawai'ian BBQ was a little "divey". The seating was cheaper outdoor patio furniture and people were eating out of styrofoam take-out containers using plastic utensils and paper cups. If this turns people off it must suck to be them because they either never went on vacation to Hawaii or they stayed in some super stuck-up place when they did. Between the decor and the soft Hawai'ian music playing in the background (actually in the kitchen area) it was a step back to my vacation.

The food was typical local Hawai'ian fare, or it sure as hell seemed that way to me. When we went on vacation we really tried to eat at local places and stayed away from touristy restaurants whenever possible. The food was so much better when it was made without the pretentious drapings and visitor sensibilities. I'm not going to delve too deep into the food, but I will say this: after our first bite the wife and I started planning on when we'd be able to come back for our second visit.

Kana Girl's Hawai'ian BBQ is obviously a family affair and a labor of love. The couple that own the place were in the kitchen singing along to their music, enjoying what they were doing while stealing the occasional kiss. It was a busy Saturday night maybe a half-hour before close and it seemed they
were having the time of their life.

NSRM Approved!For the brief times we've been eating there we really did enter into our own Island Time Zone.......

At the risk of you getting there before I do and eating the last of the pulled pork, I have to urge you tomake the trip and check it out for yourself.

They are open Tuesday-Saturday 11-8 and I don't recommend looking at their online menu until you are prepared to drive over. We made the mistake of trying to go over at 8:30 PM Friday night and you really don't want to experience that disappointment if you can avoid it.

July 4, 2013

Sriracha-Style Hot Pepper Sauce

Sriracha-Style Hot Pepper Sauce
It many respects it is way too early to be thinking ahead to Christmas, but many of the food presents I'm planning on this year take a LOT of time.

I'll be putting up some of the projects here, spoilers-be-damned, and while I cannot put finished pictures up yet, I want to start with some homemade "Sriracha" sauce...AKA "Rooster" or, in the case of some of our friends, "Cock" sauce.
Huy Fong Foods Sririacha Sauce
Before anyone takes offense, the most popular brand of Sririacha Sauce is made by Huy Fong Foods in LA. The label is in English and Thai, but everybody knows it by the big rooster on the front.

I did a lot of researching on the various different recipes that are out there and settled on coming up with my own version, which is a modification of Andrea Nguyen's recipe found on her blog Viet World Kitchen. I made a couple big changes, one of which I'm going to keep secret, but the recipe is otherwise quite close to the original.  If you want to make a small batch, you should just follow her recipe. Mine makes considerably more sauce.....by my reckoning 1 1/2 gallons. To make things easier I did break this down into smaller batches.

Sriracha-Style Hot Pepper Sauce
1 pound Habanero Peppers
11 pounds Bell Peppers
24 cloves Garlic
6 tablespoons & 2 teaspoons salt
1 cup brown sugar
4 cups vinegar
4 Sheets Nori

Acetum Capsicum No. 2
#2 Because the #1 attempt was terrible!
The instructions in a nutshell: finely chop everything except the vinegar (use a food processor), ferment for 3-4 days in glass jars, simmer for five minutes with the vinegar, cool, blend like hell, sieve, store.

I have obtained some awesome sauce bottles that will let me basically water-bath can the sauce into
appropriate bottles. When I get them put up I'll have to append this post. Until then, I want to share with you the label I made for the bottles. It took me a while to come up with the name and the general idea. I think my recipients will get it.

2013.07.07 Edit
I bottled it up last night, cleaned off the bottles and put on the shrink-wrap tops. I had 1/2 of a bottle left over. While still a bit hot for my everyday use, I mixed some with ketchup and it was great.
Shared 2013.07.08


June 3, 2013

Hacking Together an Incubator for About $20

Hacking Together an Incubator for About $20
Last week I posted about trying to make my first batch of Tempeh, or as my wife put it, "Moldy Rice Crispy Treats". I've been having fun with a variety of fermented foods lately and this was just my latest effort.

In reading about how to make some of these foods I've found a lot of different methodologies for trying to keep the "work-in-progress" a specific temperature and to keep it from drying out. Since I'm essentially growing mold/fungus I figured what would work best is what the experts in the lab use: an incubator.

Of course I don't have the thousands of dollars for a laboratory-grade incubator that is complete overkill anyway. I am lucky in that I have a few items laying around the house that I can easily turn into an incubator, courtesy of some inspiration from Make the Best Tempeh. I ended up spening about $20, but if I had to buy everything new it would have been about $75, which still isn't terrible.

May 27, 2013

Let's Make Moldy Rice Crispy Treats!

Let's Make Moldy Rice Crispy Treats!
....but not really.

Last week I experimented with making Tempeh, which is a fermented soybean product that is used as a meat substitute. When I pulled the finished product out of the incubator I made my wife took one look at it and said, "You're feeding me moldy rice crispy treats?"

It looks a lot better once when its finished off, but for a while there it really seems like one of those foods first eaten on a dare. Of course I say the same thing about beer, and I like beer. This tempeh was cobbled together from a series of different instructions, most notably from Betsy's Tempeh and Gem Cultures.

April 26, 2013

Easy Mac & Cheese

I've got a couple of "projects" coming to a head in these next two weeks, including final exams and projects for school, so I've been working on things other than updating my blog.

It happens.

While I've been a bit on the busy side with other things, I haven't been too busy to eat.  I've been making some new dishes and experimenting with some culinary projects while I'm at it, so there will probably be a few more recipe/cooking posts in the next couple of weeks.

Just wanted to warn you.

Yesterday I had a hankerin' for some Mac & Cheese.  I practically grew up on the Kraft Mac & Cheese Dinners, and as a kids they did serve as dinner.  The last couple of times I've tried making more of a baked Mac & Cheese like my grandma used to, but I haven't figured it out yet.  I have managed to find something somewhere in between these two extremes on the cheesy pasta goodness scale.  It is pretty easy to make, and good to eat.

Easy Mac & Cheese
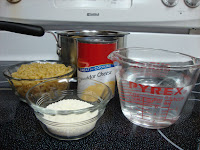
Ingredients
Easy Mac & Cheese Ingredients
1/4 Cup Powdered Milk*
11 Ounces Water
1 "Generous" Cup Uncooked Elbow Macaroni**
1 Can (10.75 oz) Cheddar Cheese Soup

*Can use 1/2 can milk & 1/2 can water in place of powdered milk & water
**Somewhere between 1 cup and 5/4 cup

Add everything except the macaroni to a small (2qt) pot, heating to
Easy Mac & Cheese
a boil.  Add in the pasta and cook, stirring often, for about 10 minutes.

Garnish and serve.  I like a little salt & pepper, but sometimes a little sriracha hits the spot.
Shared on Frugal by Choice, Cheap by Necessity 2013.05.13
Shared 2013.05.13

April 20, 2013

Sourdough Pancakes...for Reals This Time

Sourdough Pancakes...for Reals This Time
Last night I decided that this morning we needed to have pancakes, sourdough pancakes.

I thought I'd blogged about making pancakes before, but that was actually just my recipe for pancake syrup.  This time I figured I'd log the few simple steps and put down a recipe....for reals this time.

Sourdough is easy to get started but you can buy starters already made that you simply need to maintain.