Yes, I know I can get light boxes online cheaper, but I'm not wanting to save a couple of bucks.....not so much when you factor in shipping....just to have to wait another week or so.
 I decided that this need deserved to be a new project. I shopped around the thrift stores looking for a suitable project box. My initial plan was to get a cheap busted-up printer, gut it, and throw in some lights. Most of the printers probably don't work anyway and there would be plenty of room for lights.
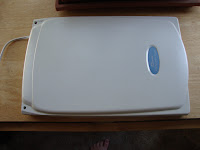
In the end....basically the next to last thrift store on my route I found an old Mustek scanner. The
scanner glass was a bit bigger than the what the printers had so I'd have a bigger work surface, but the scanner wasn't that thick, which limited my lighting options.
 Opening the scanner was pretty easy. You can actually see the two
screw-holes in the before/after picture above. There wasn't much to remove. Once that was finished I covered the bottom with some aluminum foil and taped some tracing paper on the underside of the glass on the upper section.
Illumination proved to be a bigger problem than originally planned. I didn't want to put too much money into lighting it up, but the cheapest options were right out because of the thin form factor. If I went with a printer I might have been able to use incandescent lights and then vent the extra heat. Fluorescent lights might fit, but realistically I'd need to basically wire in my own transformer and ballast. That is just too much work.
For a little bit cheaper I was able to find some LED strips at Fred Meyer. This surprised me because all the LED lights I saw at the other stores (and online) were über-expensive. If I had known months ago I'd have stocked up on some white LED Christmas lights. I could have packed in a few dozen for real cheap.
 I tested things with one light and that wasn't enough. I didn't think it would, which is why I bought two. These lights were designed to be clipped together to form a chain of up to 20 light strips. I figured
I'd glue the lights to the side, but the lights were too close together. I ended up having to cut the connecting clip off of one light and splice it in to the next light so I had enough room to stretch the lights within the case. I had to make some minor adjustments to the top half of the case to make the scanner fit back together properly.
 |
| Shared 2013.04.08 |
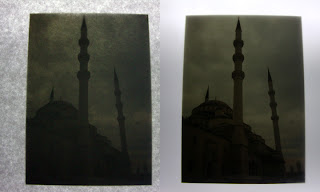
I plan on generally using this light box not with photos, but with printed paper, so if this works with
photos on professional photo paper, I should have no problems whatsoever.


No comments:
Post a Comment