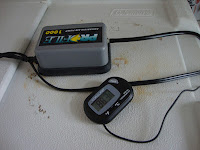
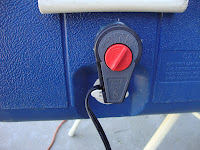
In reading about how to make some of these foods I've found a lot of different methodologies for trying to keep the "work-in-progress" a specific temperature and to keep it from drying out. Since I'm essentially growing mold/fungus I figured what would work best is what the experts in the lab use: an incubator.
Of course I don't have the thousands of dollars for a laboratory-grade incubator that is complete overkill anyway. I am lucky in that I have a few items laying around the house that I can easily turn into an incubator, courtesy of some inspiration from Make the Best Tempeh. I ended up spening about $20, but if I had to buy everything new it would have been about $75, which still isn't terrible.
2013.07.17 Edit: You might want to skip ahead to the end for an easier to make incubator
The first thing I did was scrounge for my beginning parts list. The hardest thing to find was a suitable
 insulated vessel that I could fit everything into. Using a $200 (used) insulated catering transport box wasn't going to work. Out in the garage I managed to locate an old cooler that has seen better days. I have no idea how it go this dirty, but when I cleaned it up I discovered it was back from my days in the Air Force. The last time I was a "Senior Airman" was 1996 so this thing is at best 17 years old. No problem sacrificing this cooler to the cause. It was big enough to fit my largest glass pan, which is a major plus.
The rest of the parts list is pretty simple: an adjustable aquarium heater, an aquarium pump, and airstone, and a good thermometer. I had most of that already on hand from my old aquarium setup. I had upgraded to a new automatic heater so I had the old one handy. I wasn't sure how big the heater was and while I could have gone out to the garage to get a caliper, I figured it was about an inch so I just punched out a 1" hole in some paper and did a dry fit. I was right.....and this made the next step so much easier.
 I carted my now clean cooler outside and drilled a 1" hole in the
side above the drain plug. I had taken the heater apart to cut-off part of the fastener that wasn't needed and dry fitted the tube. It was quite snug. After assembling the heater I hot glued it in place, glued the drain plug shut, and then covered the hot glue with aquarium silicone....just to be sure.
Using some small 1/2" PVC tubing I had, I built a small platform inside the cooler. This platform
supports the glass pan I'd place inside later, making sure it will not be able to come into contact with the heater. When filled, the water covers the heater by a couple of inches and the pan generally floats around in the cooler. While I could probably do without this little safety cage, it was a bit of piece of mind for me. I ended up having to go to the store for some PVC connectors so at this point I'm $5 into the project for supplies.
The only things I need to finish things off are a little more aquarium tubing, the airstone, and a good thermometer. A quick trip to the pet store and $16 later I have everything I need. I already had an airstone, but once you use them you want to keep them wet and this one was a bit small anyway. I wanted a larges stone to really move the water around some to help keep the temperature consistent. For this project you really want a good quality digital thermometer because the cheaper analog ones are calibrated for slightly lower temps and you want to be able to get a good, accurate measurement because different cultures have different heating needs.
I should mention that I had to make another small hole in the side for the airline and the temperature probe to fit through. I sealed that hole up with hot glue and silicone as well. Normally you would want some kind of hole for air to be able to come out of since you are pumping air into the cooler. This particular model has a small inset flip lid for getting stuff out of the cooler without having to open the full lid. I just open this up a bit as needed.
 It doesn't take long for the water to heat up in my incubator and I
 don't have to fiddle with the temperature too much. In the end I have but two small issues. The first is while I'm incubating something it makes and odd gurgling noise as the air collects under the pan and then breaks free all at once. It just doesn't sound....natural. I'll probably use the incubator out in the garage to keep the noise down. The second issue is potentially more severe. This incubator leaks a little bit. The odd thing is that it doesn't leak at all during use. I noticed that after I'm done incubating my tempeh, if I let the cooler sit full with water, a small drip comes out of the heater element. It is very slow, maybe a cup a day, only drips when the unit is off and it isn't actually going through the electronics of the heater. Simply giving the incubator a couple hours to cool down and then emptying it out is sufficient to prevent any mess.
 |
| Shared 2013.06.03 |
All-said I put about $21 in new supplies into this incubator. It does it's job well and was totally worth
it in order to successfully create tempeh. I also plan on using this to incubate starters for homemade soy sauce as well.
2013.07.13 Edit: I thought it might be a good idea to use some birthday money to have a second go at this incubator after using the old one a few times. It took me a while to realize that the thermometer was constantly running about 3 degree to high so I was always fiddling with the heater.
A newer big cooler was on sale and I went ahead and purchased it along with a submersible heater, another airstone, and a splitter for my air hose. My plan was to use one of those desk plugs, the kind you use to thread computer cables through a desktop, in the lid to act as a pass-through for the various lines and hoses.
It was far easier to just drop everything in, heater one side everything else on the other, before filling it up with water. I usually wanted the lid open a crack, which was more than enough room for the cables. With a submersible heater I just have to set the temp and drop it in. The glass pan displaces enough water to float.
Cleanup is simple and I can use the cooler for other tasks if I want.


No comments:
Post a Comment